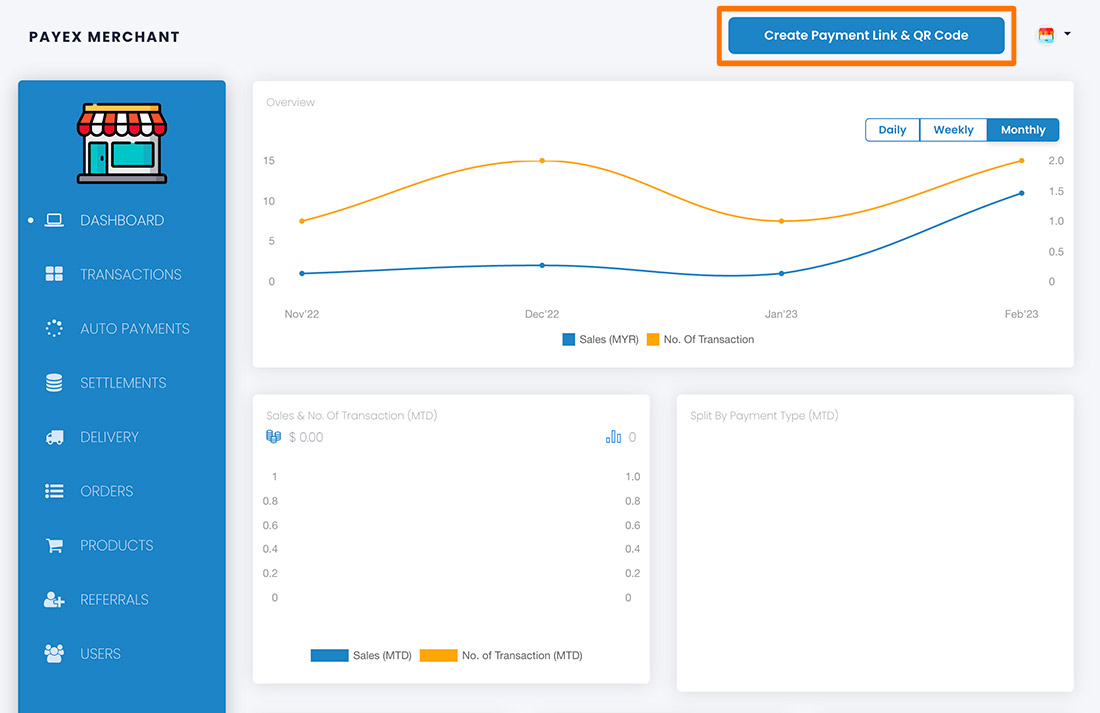
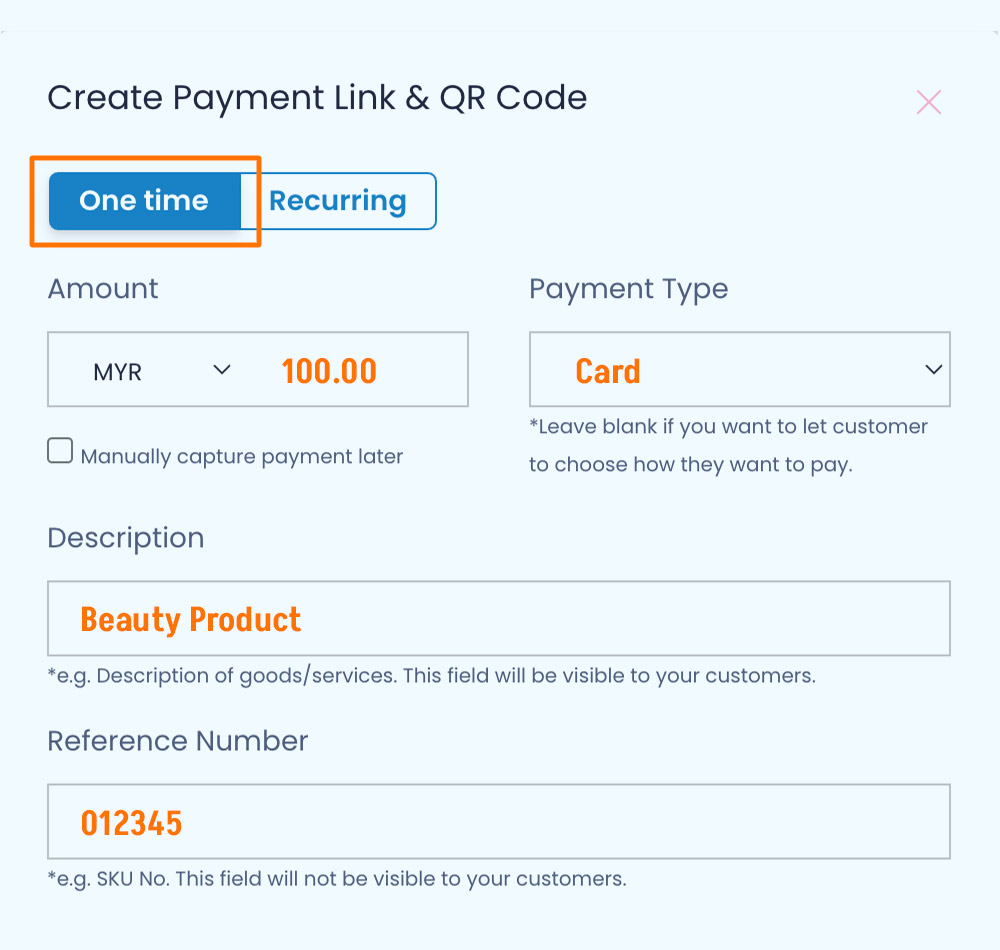
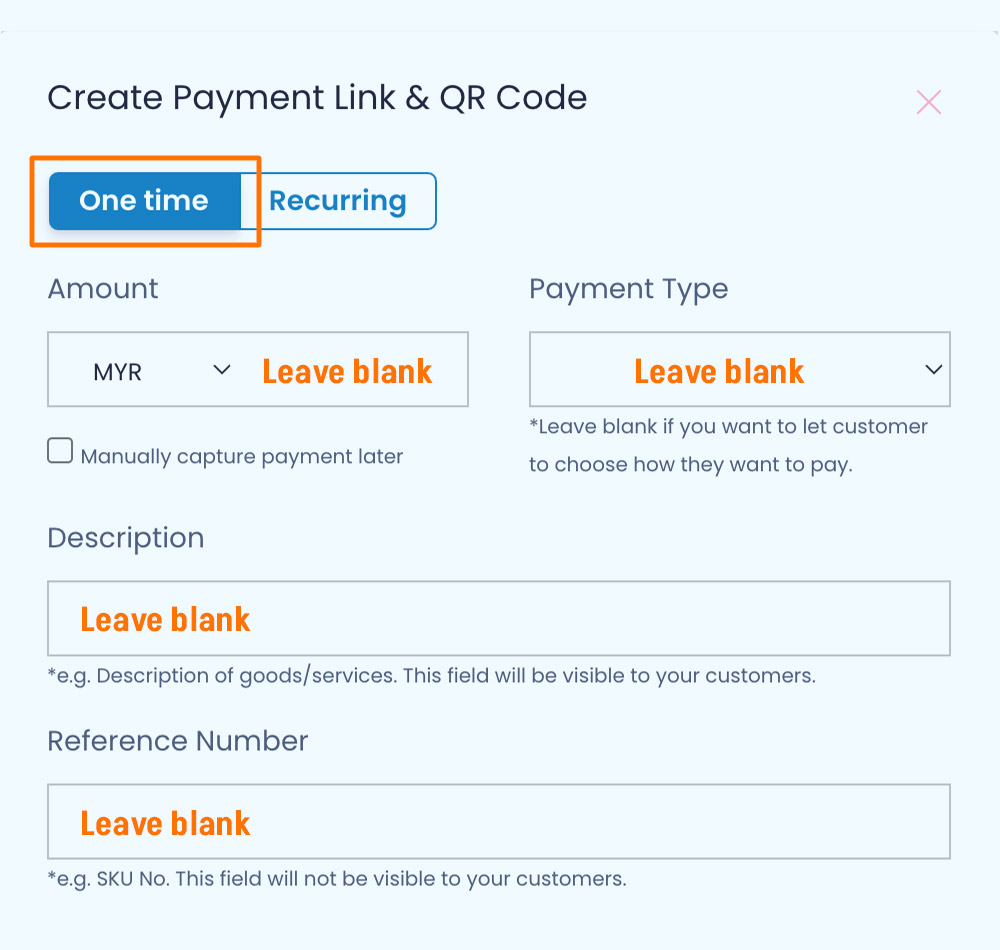
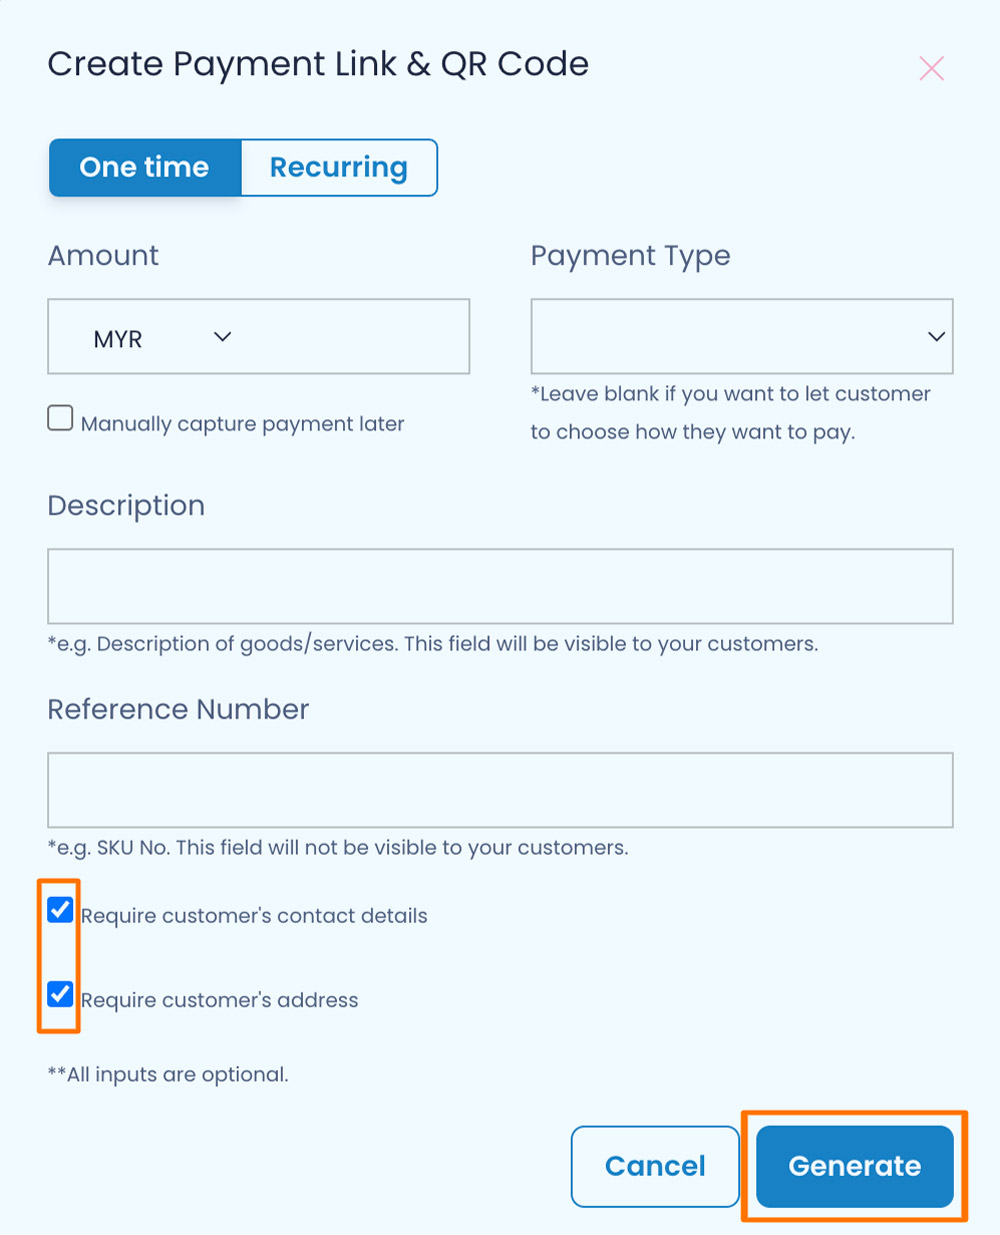
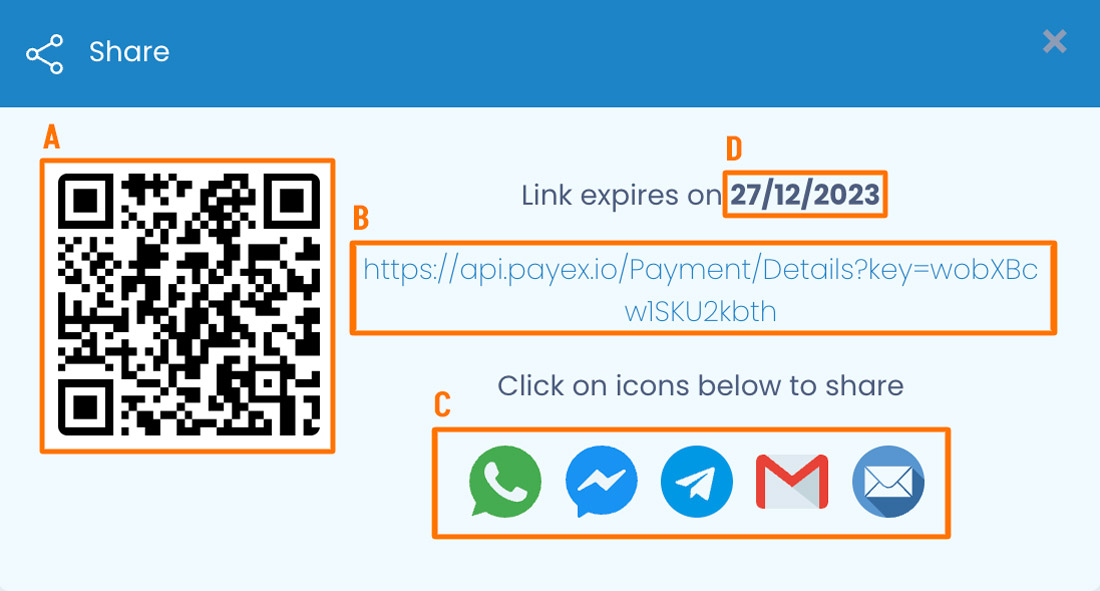
How to Create Payment Link & QR Code Step 1 Login to Payex’s portal Log on to our portal at https://portal.payex.io/Home, and key-in your credentials. Step 2 Create payment link & QR code Click the “Create Payment Link & QR Code” button on the top of the page once you’re logged in. Step 3 Fill out payment details For a one-time use payment link, click the “One time” tab. There are 2 options: Option 1 To create a payment link with the amount and payment type determined by the merchant, fill in all the fields on the form. Option 2 To create a payment link for general use, leave the fields blank to be filled out by the customer. Step 4 Generate payment link & QR code Uncheck the box for “Require customer’s contact details” if you do not require customer’s details. Uncheck the box for “Require customer’s address” if you do not require customer’s address. Click the “Generate” button to generate the payment link & QR code. Step 5 Save & share payment link & QR code A: Right-click and select “Save” to store the QR code to be printed and displayed at your cashier counter. B: Copy the payment link to save or share to your customers. C: Click on any platform’s icons to share the payment link to your customers. D: Do note the expiry date of your payment link. All payment links are valid for 1 year from the date of creation. Note: We do not store payment links & qr codes. Please re-generate a new link if you lost yours.